
准备工作
注册 Github 账号
下载 PicGo
创建新仓库
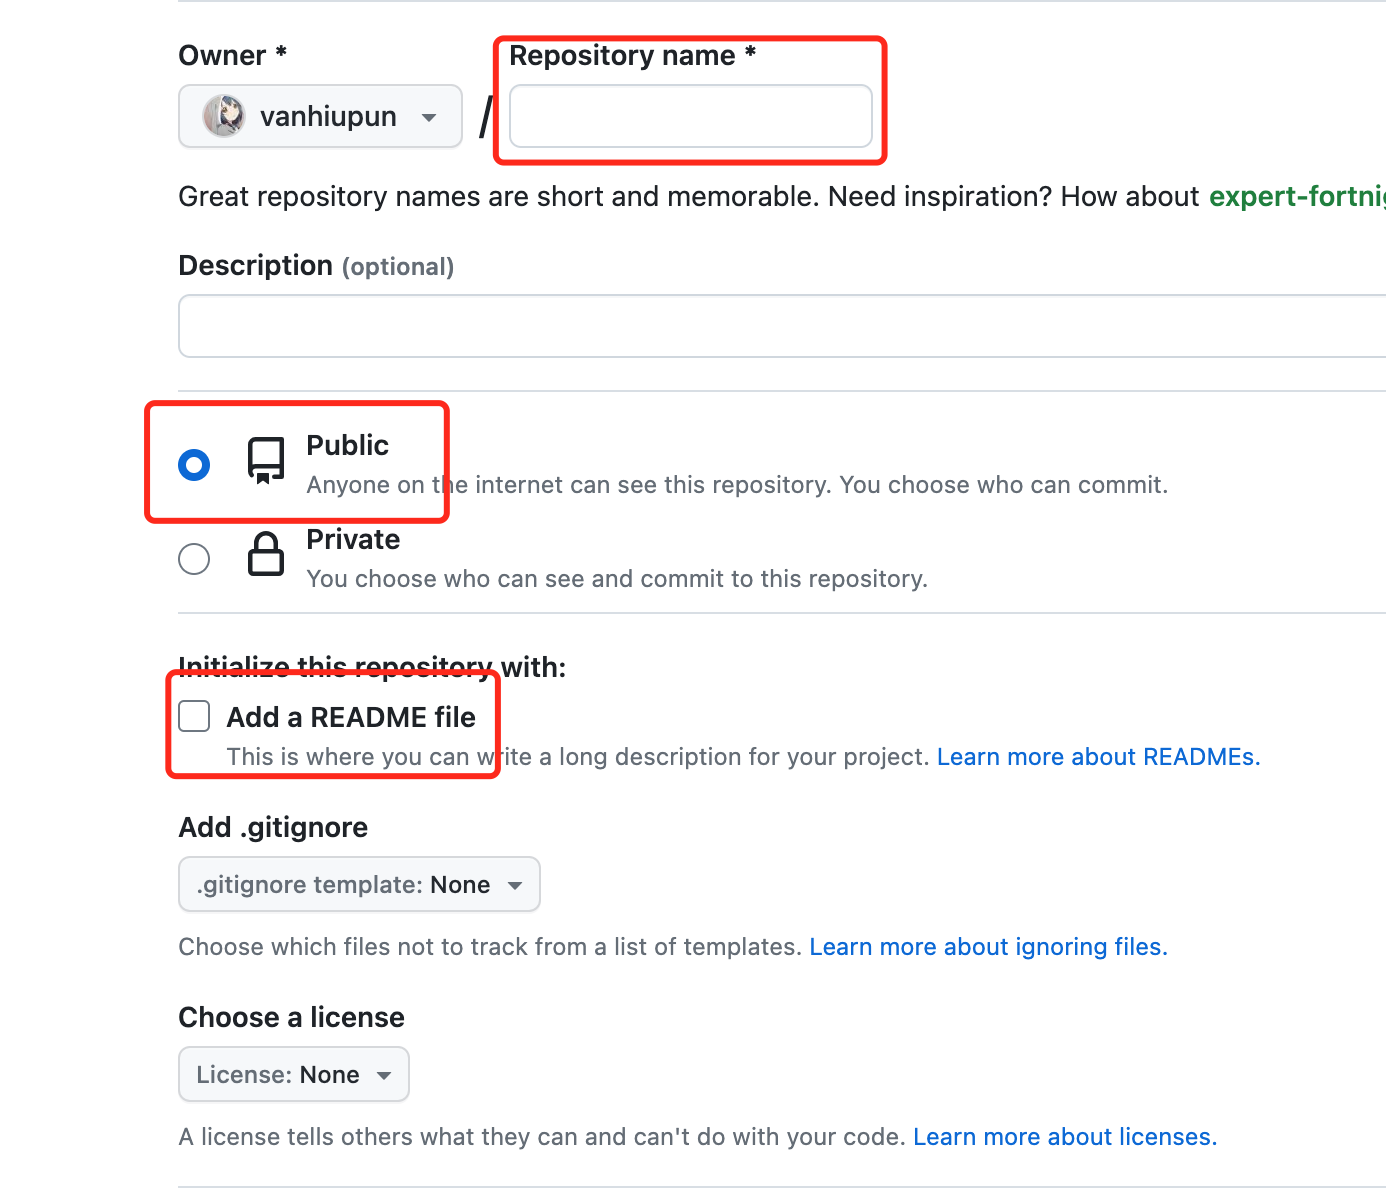
public 的,否则存储的图片不能正常访问。生成 Token
生成 Token
- 点击左侧的
Tokens(classic) - 再点击
Generate new token(classic)
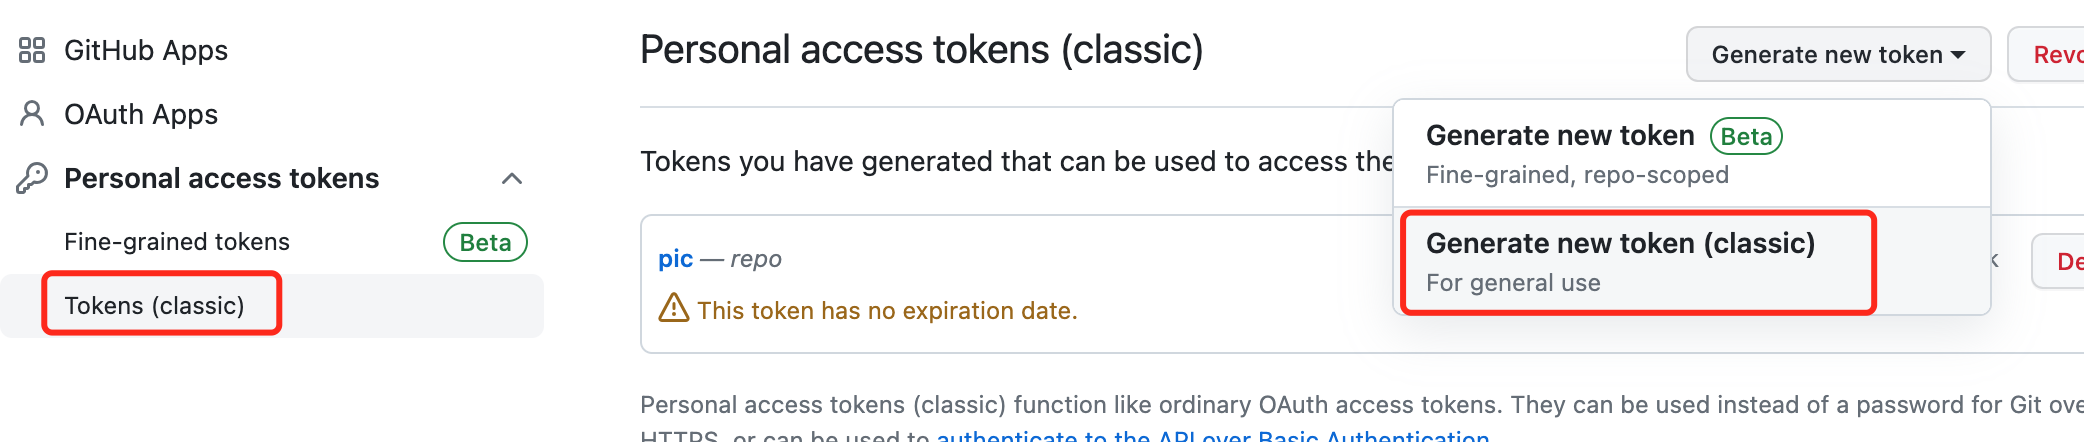
Note,勾选repo,点击生成Token注意
生成的 token 只会在这里显示一次,记得单独保存下来。
配置 PicGo
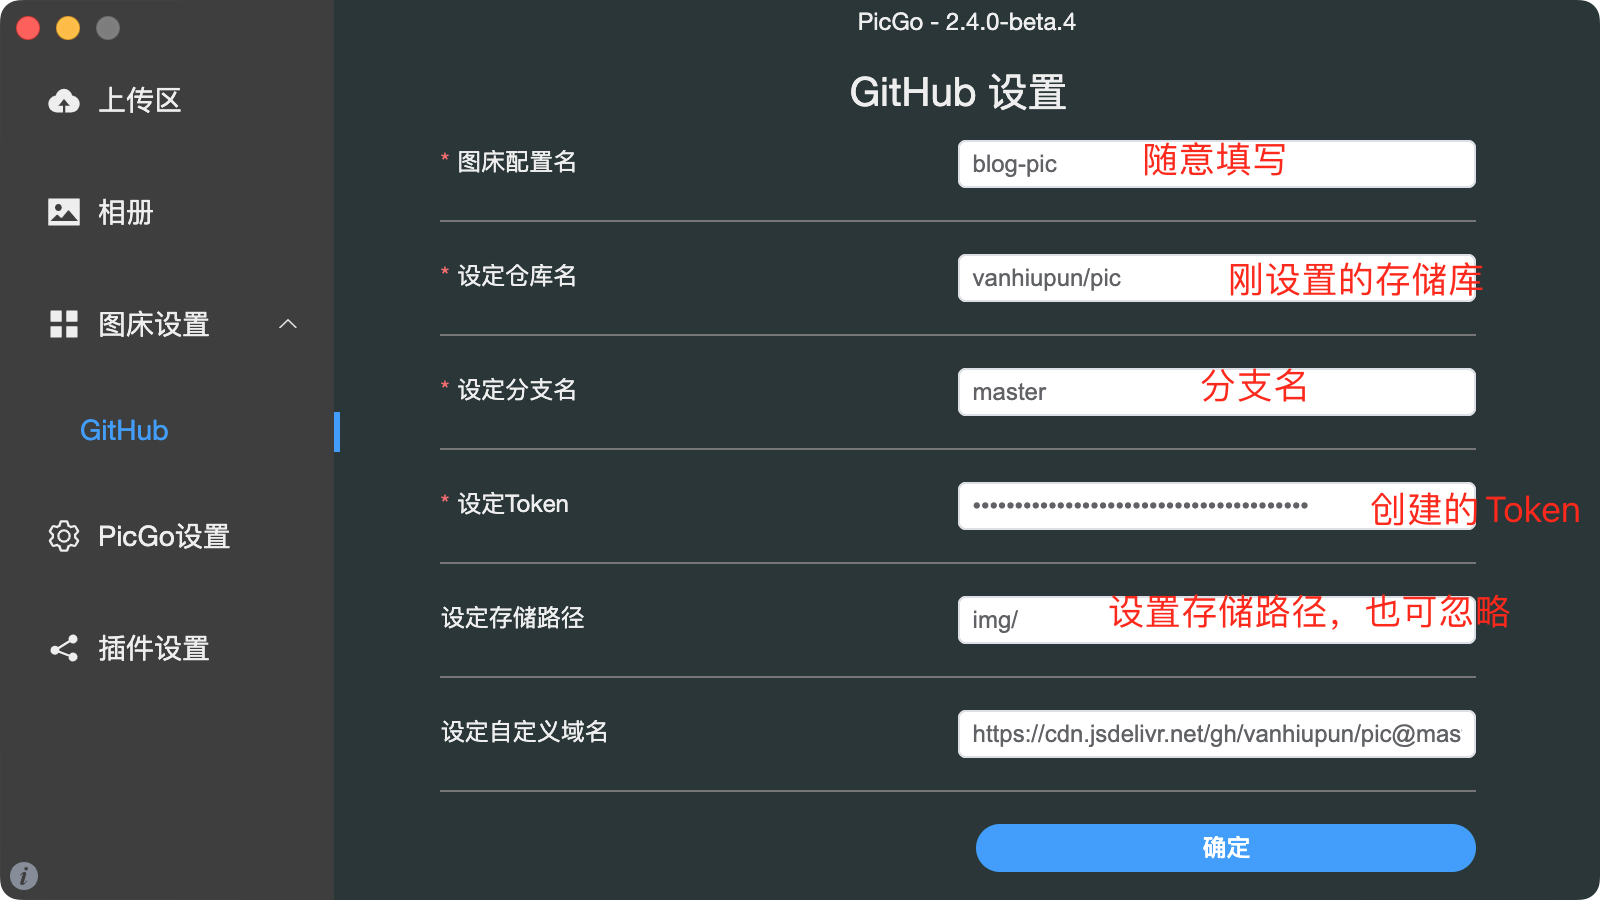
配置 PicGo
图床配置名:随意填写设定仓库名:为刚设置的存储库设定分支名:存储库的分支名设置Token:创建的 Token设定存储路径:可以设置为文件夹,如:img/;也可忽略
配置 imgbot 无损压缩图片

然后选择 Open Source (也就是免费的那个方案),然后点击 Install it for free
检查一下订单,点击 Complete order and begin installation

设置 ImgBot 频率与压缩方式
ImgBot 默认是无损压缩的,可以按需进行配置为有损压缩,对文件大小进一步压榨。配置方法是在根目录下添加 .imgbotconfig 文件
目前有三个配置项:
提交 PR 的频率:"schedule" 选项:daily | weekly | monthly 排除的文件:"ignoredFiles"
选项:被排除文件的路径,支持通配符* 是否使用有损压缩方式 (压缩率更高):"aggressiveCompression"
选项:true | false 以下是较为完整的例子:
{
  "aggressiveCompression": "true", // true|false
  "ignoredFiles": [
    "*.jpg", // ignore by extension
    "image1.png", // ignore by filename
    "public/special_images/*" // ignore by folderpath
  ],
  "schedule": "daily" // daily|weekly|monthly
}
还有更多配置项,完整说明请见 官方文档
。

Github Actions 自动合并 ImgBot 的 pr
上传图片后,很快 ImgBot 就会对图片进行压缩,并在 github 的仓库中发起一个 pull request。手动点击合并按钮对我来说实在是太麻烦了,能不能自动搞呢。有了 actions 没啥不能的,
在 github actions 配置新增一个文件 .github/workflows/merge.yml。
name: Merge Imgbot

on:
  pull_request:
    types:
      - opened
      - ready_for_review
  pull_request_review:
    types:
      - submitted
  status: {}

jobs:
  imgbot:
    name: imgbot
    runs-on: ubuntu-latest
    permissions: write-all
    if: ${{ github.actor == 'imgbot[bot]' && github.event_name == 'pull_request'}}
    steps:
      - name: Enable auto-merge for imgbot PRs
        run: gh pr merge --auto --squash "$PR_URL"
        env:
          PR_URL: ${{ github.event.pull_request.html_url }}
          GITHUB_TOKEN: ${{ secrets.GITHUB_TOKEN }}
设置仓库 Github Actions 权限
在仓库的设置中,找到 Github Actions 选项,点击 Actions - General 选项卡,勾选 Read and write permissions


GitHub Proxy 加速访问(二选一)
在 PicGo 图床配置中添加如下自定义域名即可;
https://ghp.ci/https://github.com/GitHub用户名/仓库名/raw/分支名
例如:https://ghp.ci/https://github.com/Theo-Messi/pic/raw/main
Vercel/Netlify 加速访问(二选一)
使用 GitHub 账户登陆 Vercel


